Thank you for your subscription!


Creating a new recording
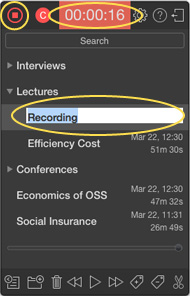
To create a new recording, click the "Record" button in the application, or just use the shortcut Cmd+R (which is available from any application). Recording will begin and a new entry will be added to the list. The recording time is shown in the upper panel. To stop recording, click the "Stop" button.


Synchronization with Dropbox
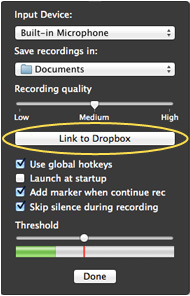
To sync recordings with Dropbox go to the program's settings (gear icon on the top panel), click “Link to Dropbox” button, and enter your Dropbox login and password.
The “eXtra Vocie Recorder” folder will be created in the Applications folder in your Dropbox and your recordings will be uploaded into this folder automatically (it can take a few minutes). Now all changes you make in the app or in the Dropbox will be synced automatically between the app and Dropbox.
To stop the synchronization click the "Unlink from Dropbox" button in the program's settings.
Sound Detector
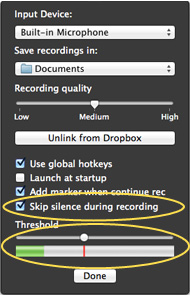
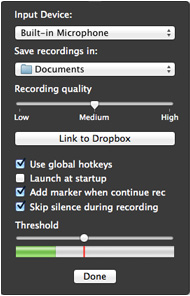
This function allows skipping long pauses and recording only when sound is present. To set the sound threshold level at whichrecording will be stopped, go to the program's settings. Thus if the level of sound is lower than the specified threshold,recording will automatically stop; when the sound exceeds that threshold, recording will automatically resume.
Configuring Sound Detector
The sound level is displayed using a green bar, while the recording threshold is represented by a vertical red line. You can set therecording threshold using the slider located slightly below. Recording will take place only when the signal level crosses the red line (recording threshold).
Configuring recording
To open the settings, click the "Preferences" button (gear icon on the top panel). You can:
- Select the device used for recording;
- Select the folder where all of your recordings will be stored;
- Set recording quality;
Splitting recordings
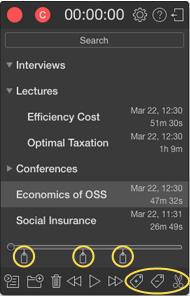
You can split recordings by using the markers that have been added to a recording. To add a marker, move the slider to the necessary position and click the "Add Marker" button. You can also add markers during recording — just click "Add Marker". To delete a marker, select it by clicking on it, and then click the "Delete Marker" button.
To split a recording, using the markers as boundaries, click the "Split" button. The resulting recordings will appear in the same category as the source one. The source recording remains unchanged.
Markers and comments
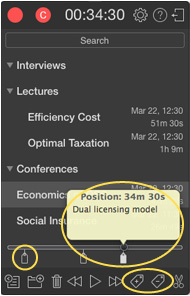
To add a marker, move the slider to the necessary position and click the "Add Marker" button. You can also add markers during recording — just click "Add Marker". To delete a marker, select it by clicking on it, and then click the "Delete Marker" button. To add comments to a marker, select it and type in the text entry field that appears.
Descriptions and photos
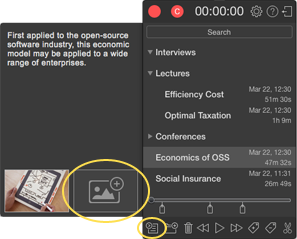
To create a description, select the relevant recording. On the left side of the program, a window will appear with the following configurable options:
- Recording description;
- Photos.
To hide descriptions, click the "Hide Descriptions" button. To show descriptions, click the "Show Descriptions" button.
To add a photo click “Add Photo” icon at the bottom of the description, select the photo, and click “Done” button. The photo will be associated with the time of the recording. To delete a photo, select the photo, and press “Delete” button (trash icon) on the top of the photo.


